Dashboard Set-Up Guide
Dashboard set-up can be a daunting task to begin. Below is a guide on how you can start setting up your team’s Dashboard to track Sprint tasks.
|
Check with your mentor to see if they have a preferred Dashboard platform. |
Option 1: Microsoft Teams Task Planner
Using MS Teams Task Planner is STRONGLY recommended as our teams are hosted on MS Teams. Follow the steps below to set up your teams planner.
Start by opening your teams application and logging in. This demonstration assumes you are already assigned a team.
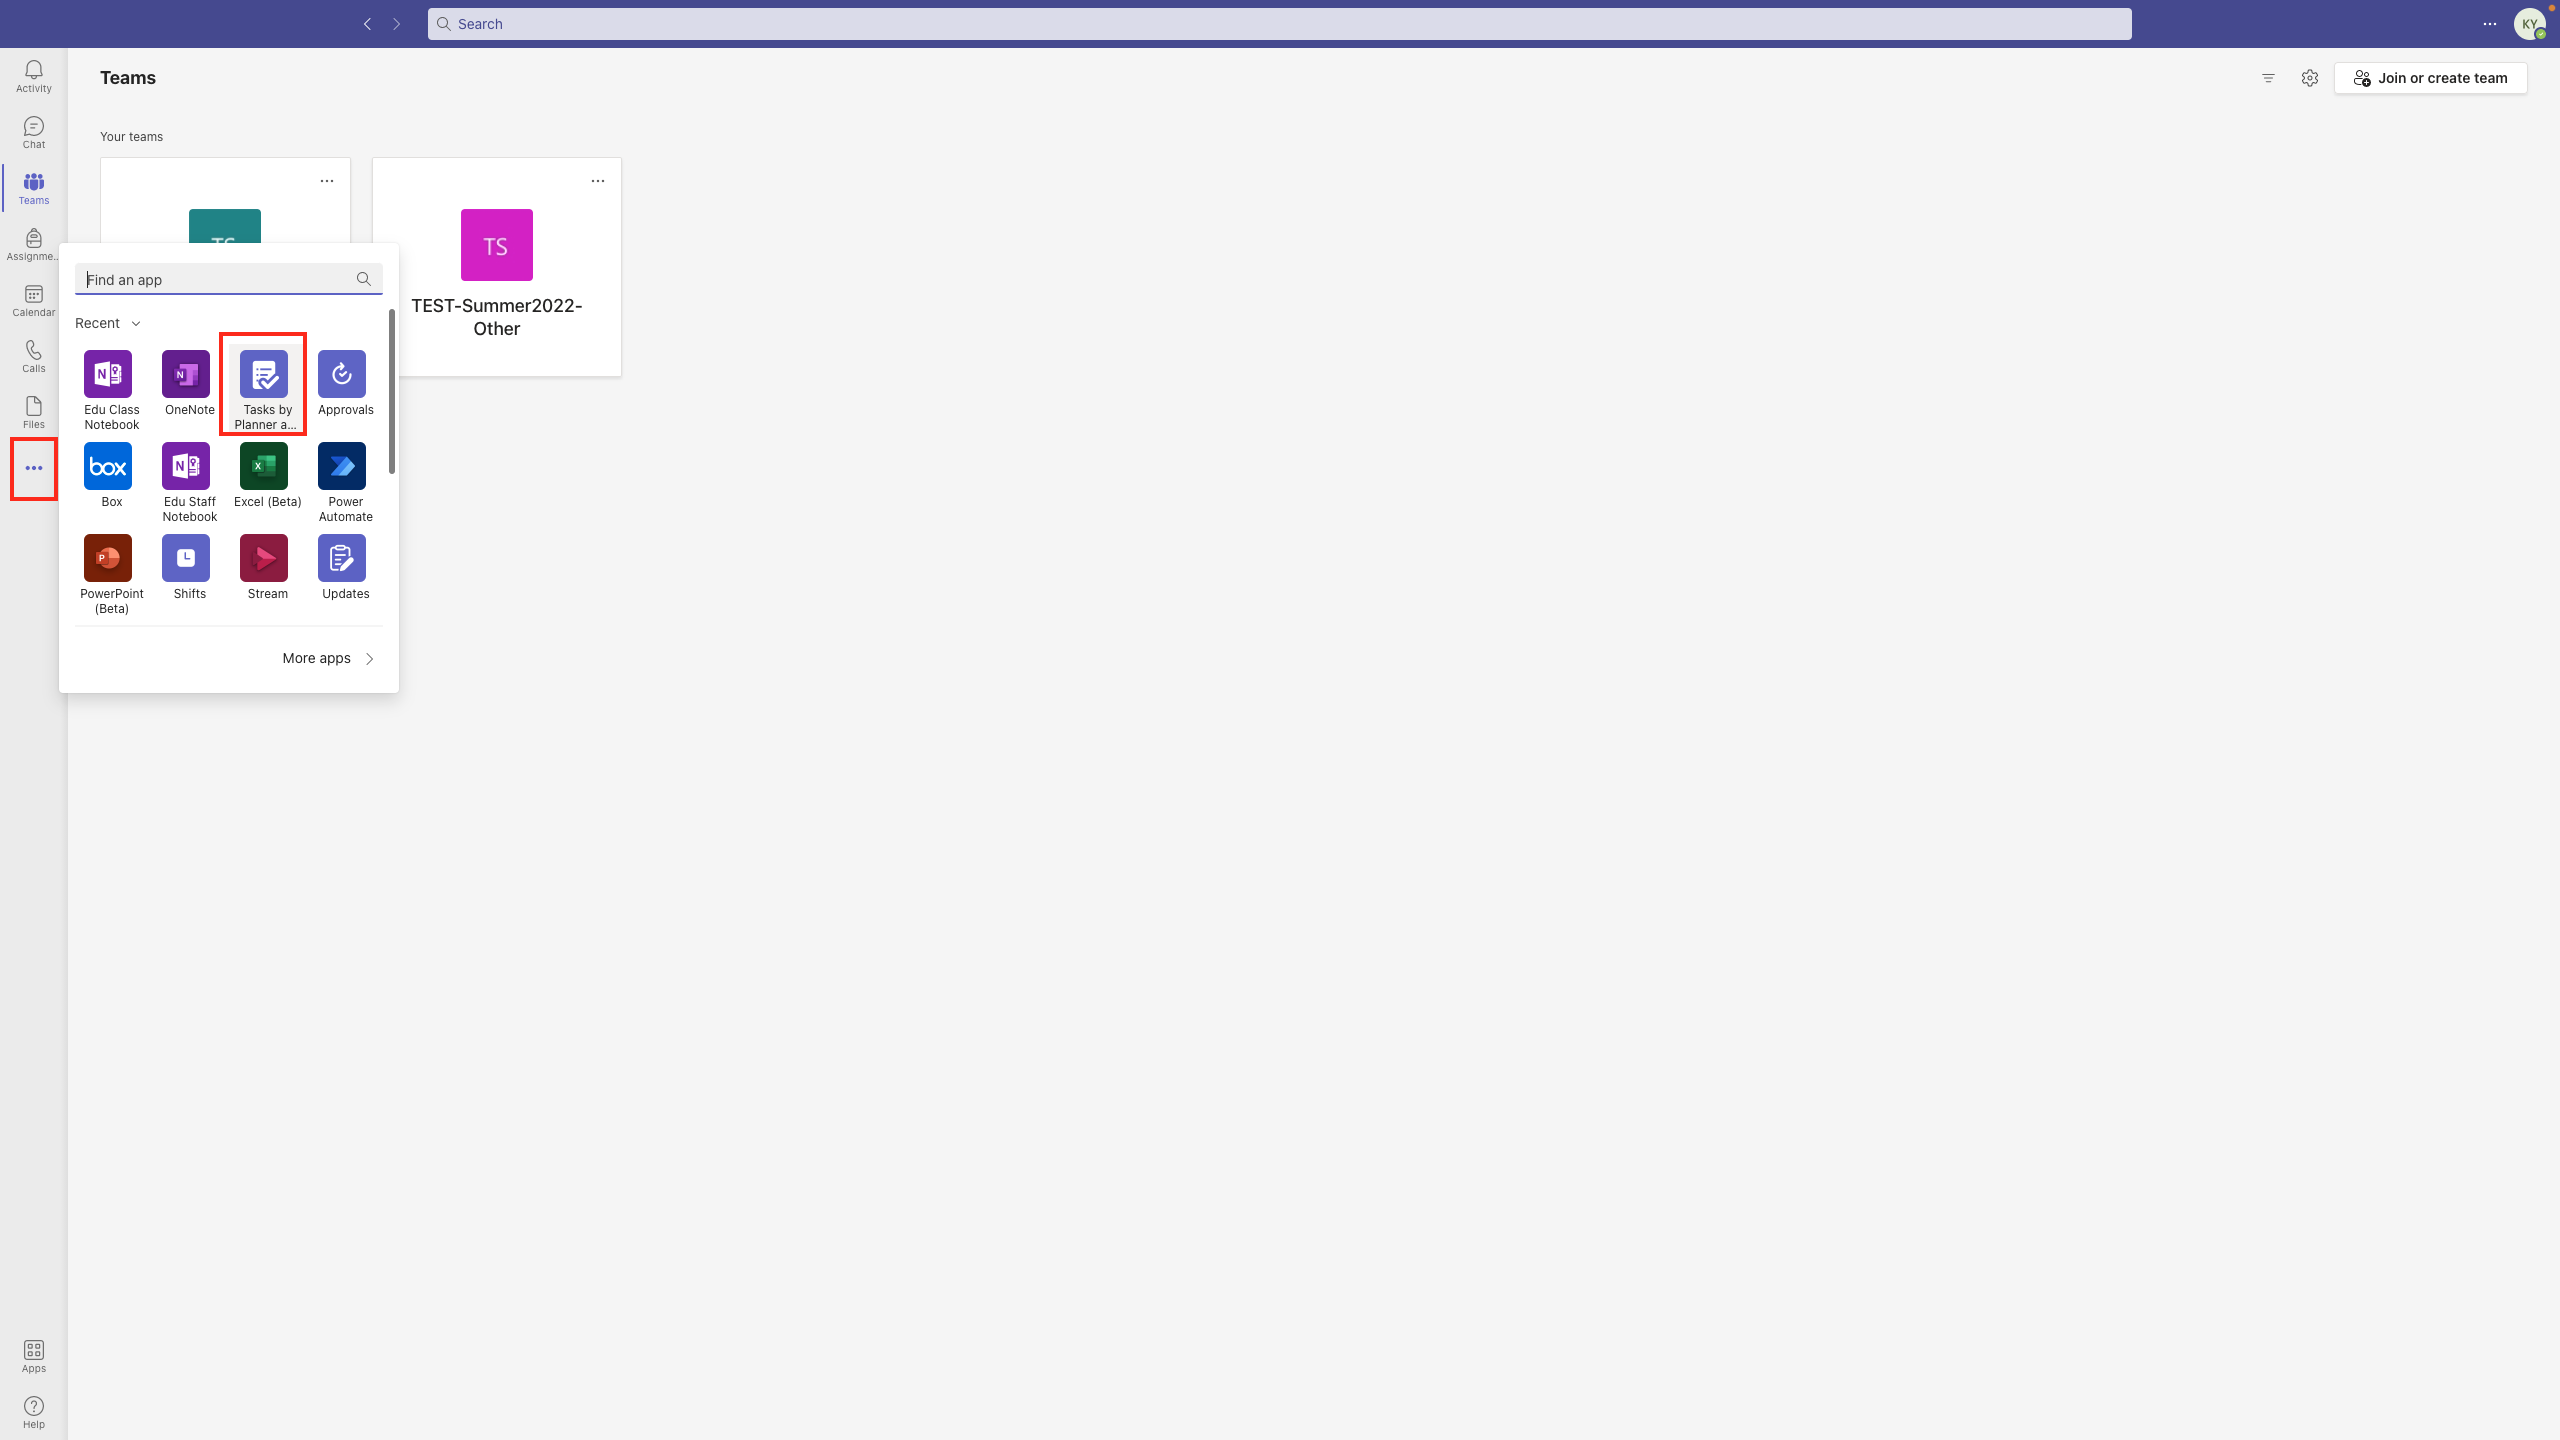
First, open the task planner by navigating to the three dots on the left panel of the screen. Then select the Task Planner application.
Then you will be brought to the home dashboard where you are able to create lists or boards. You can create personal boards as well as shared team boards.
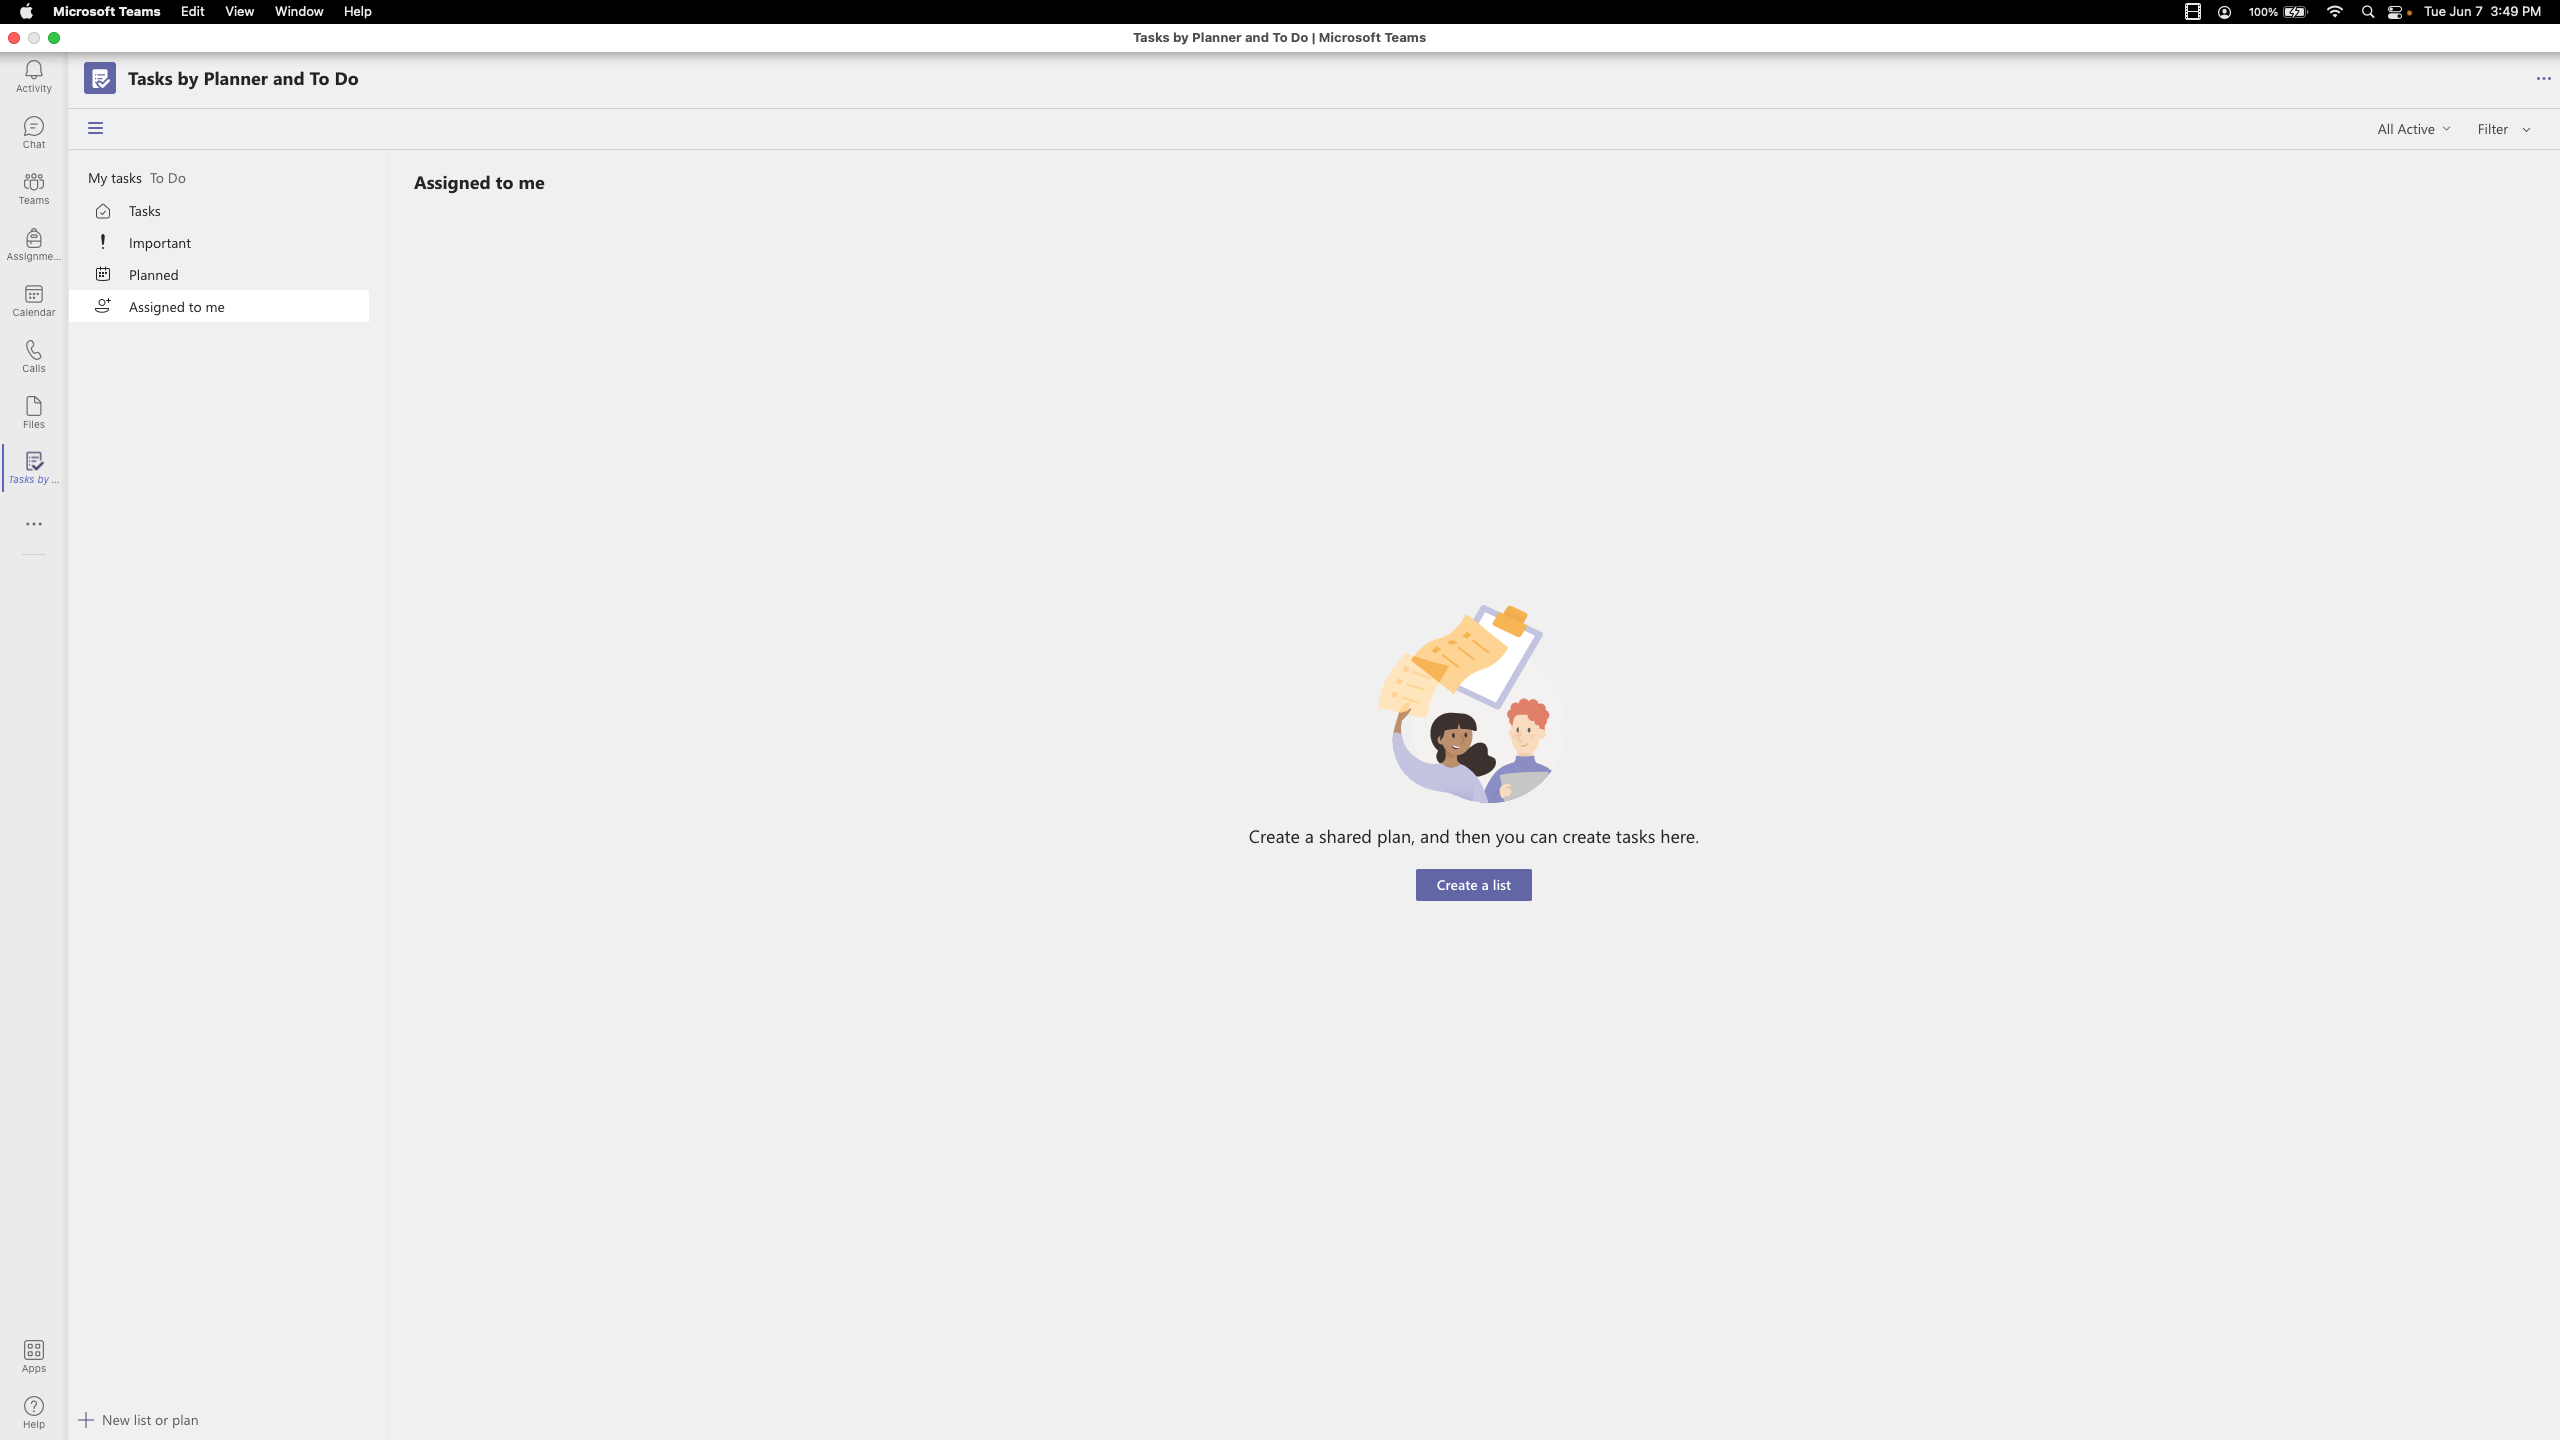
From the home dashboard you can create a list and add it to your team and preferred channel. Choosing this location will help your team stay organized, especially if you have sub-teams. If you are not sure where to add the list, it is common to add it to the 'general' channel.
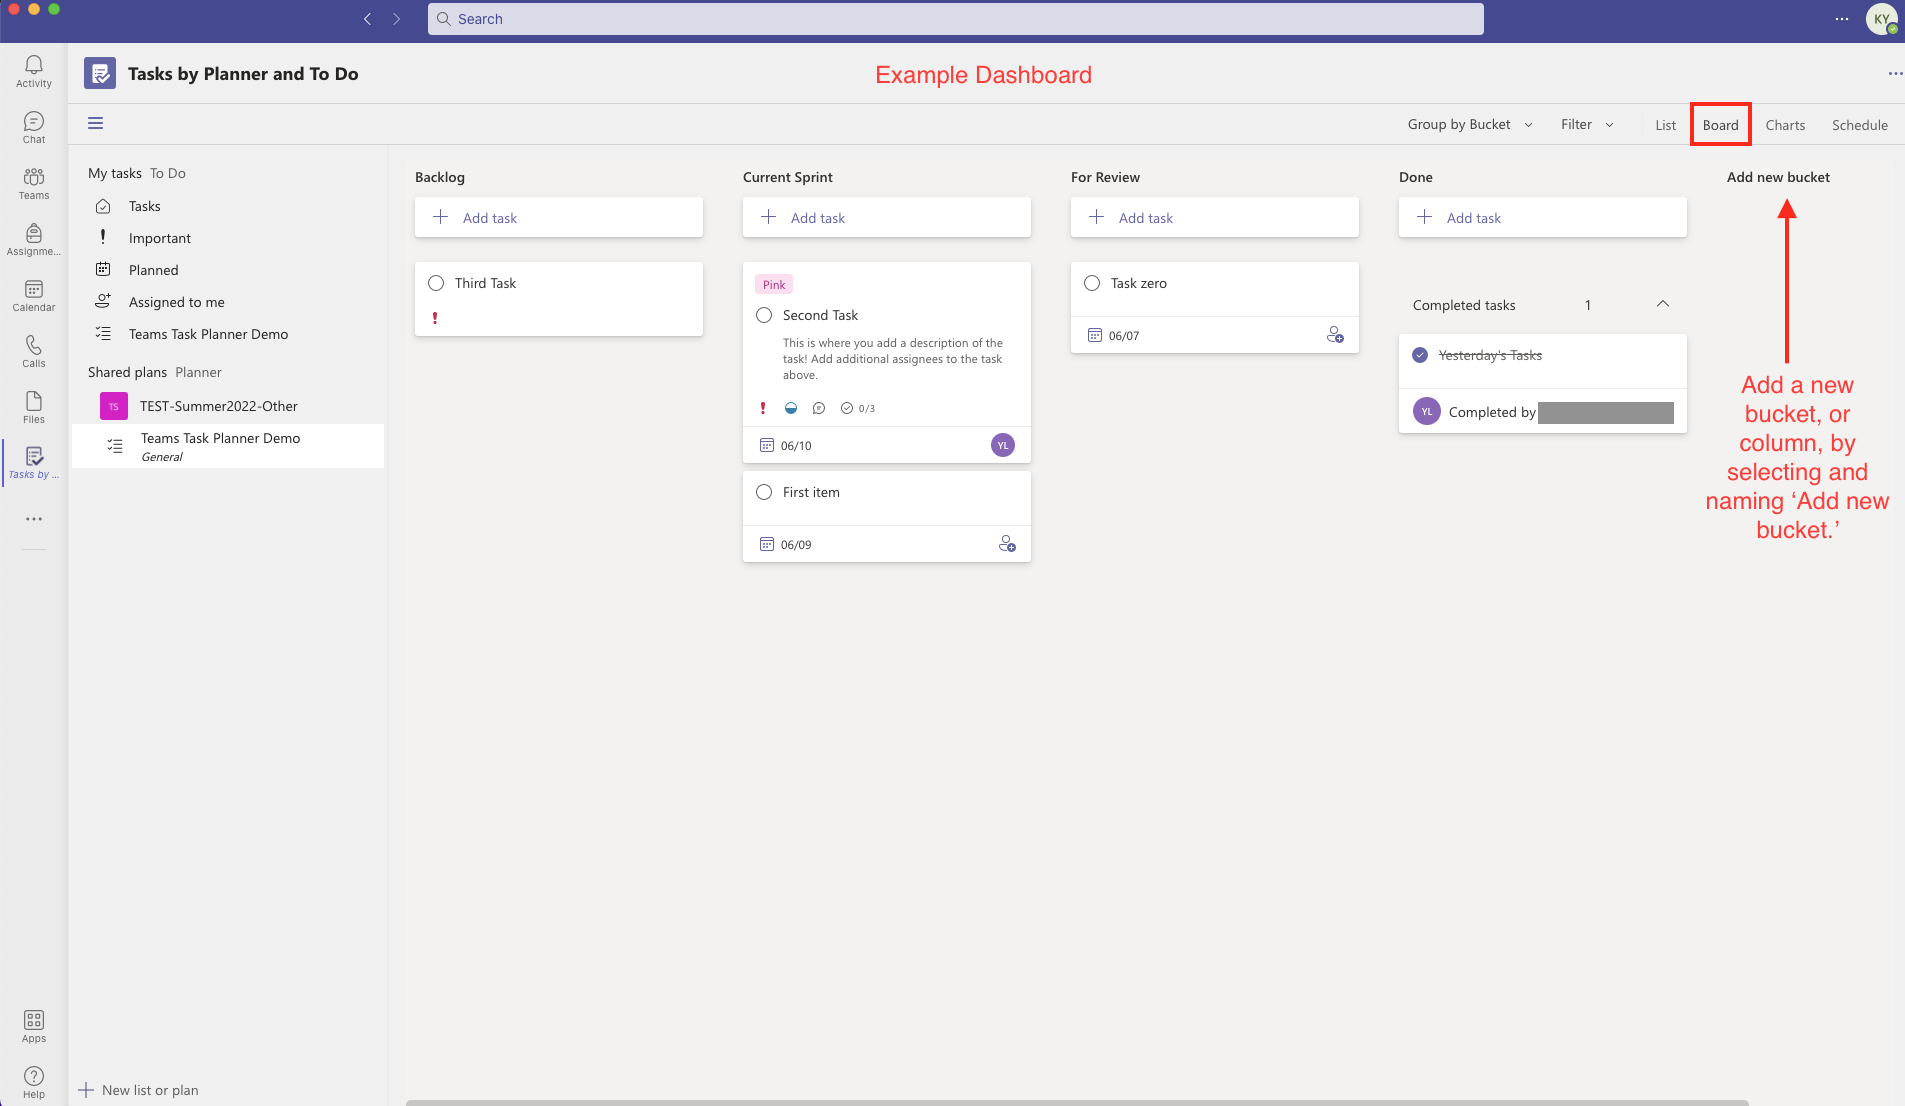
Below, you will see a basic example of a dashboard with some items. Your team’s will be more specific and full.
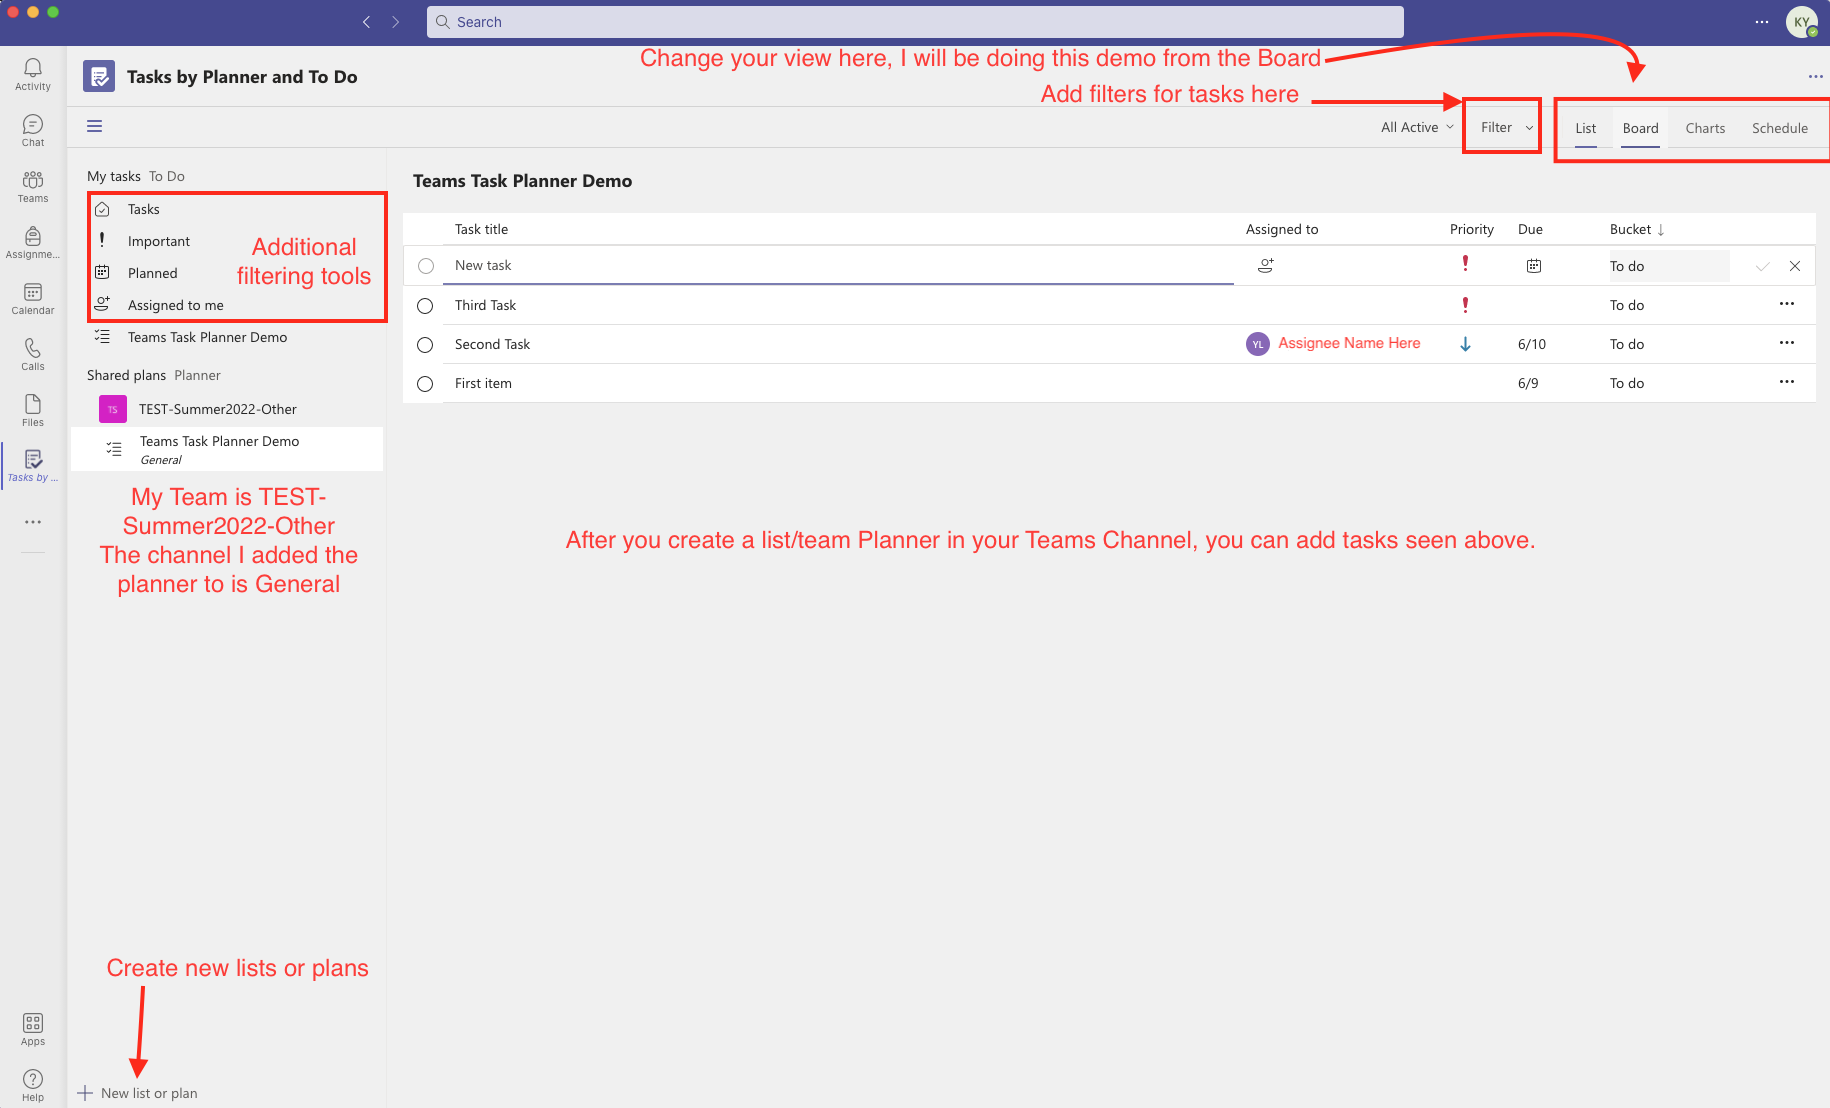
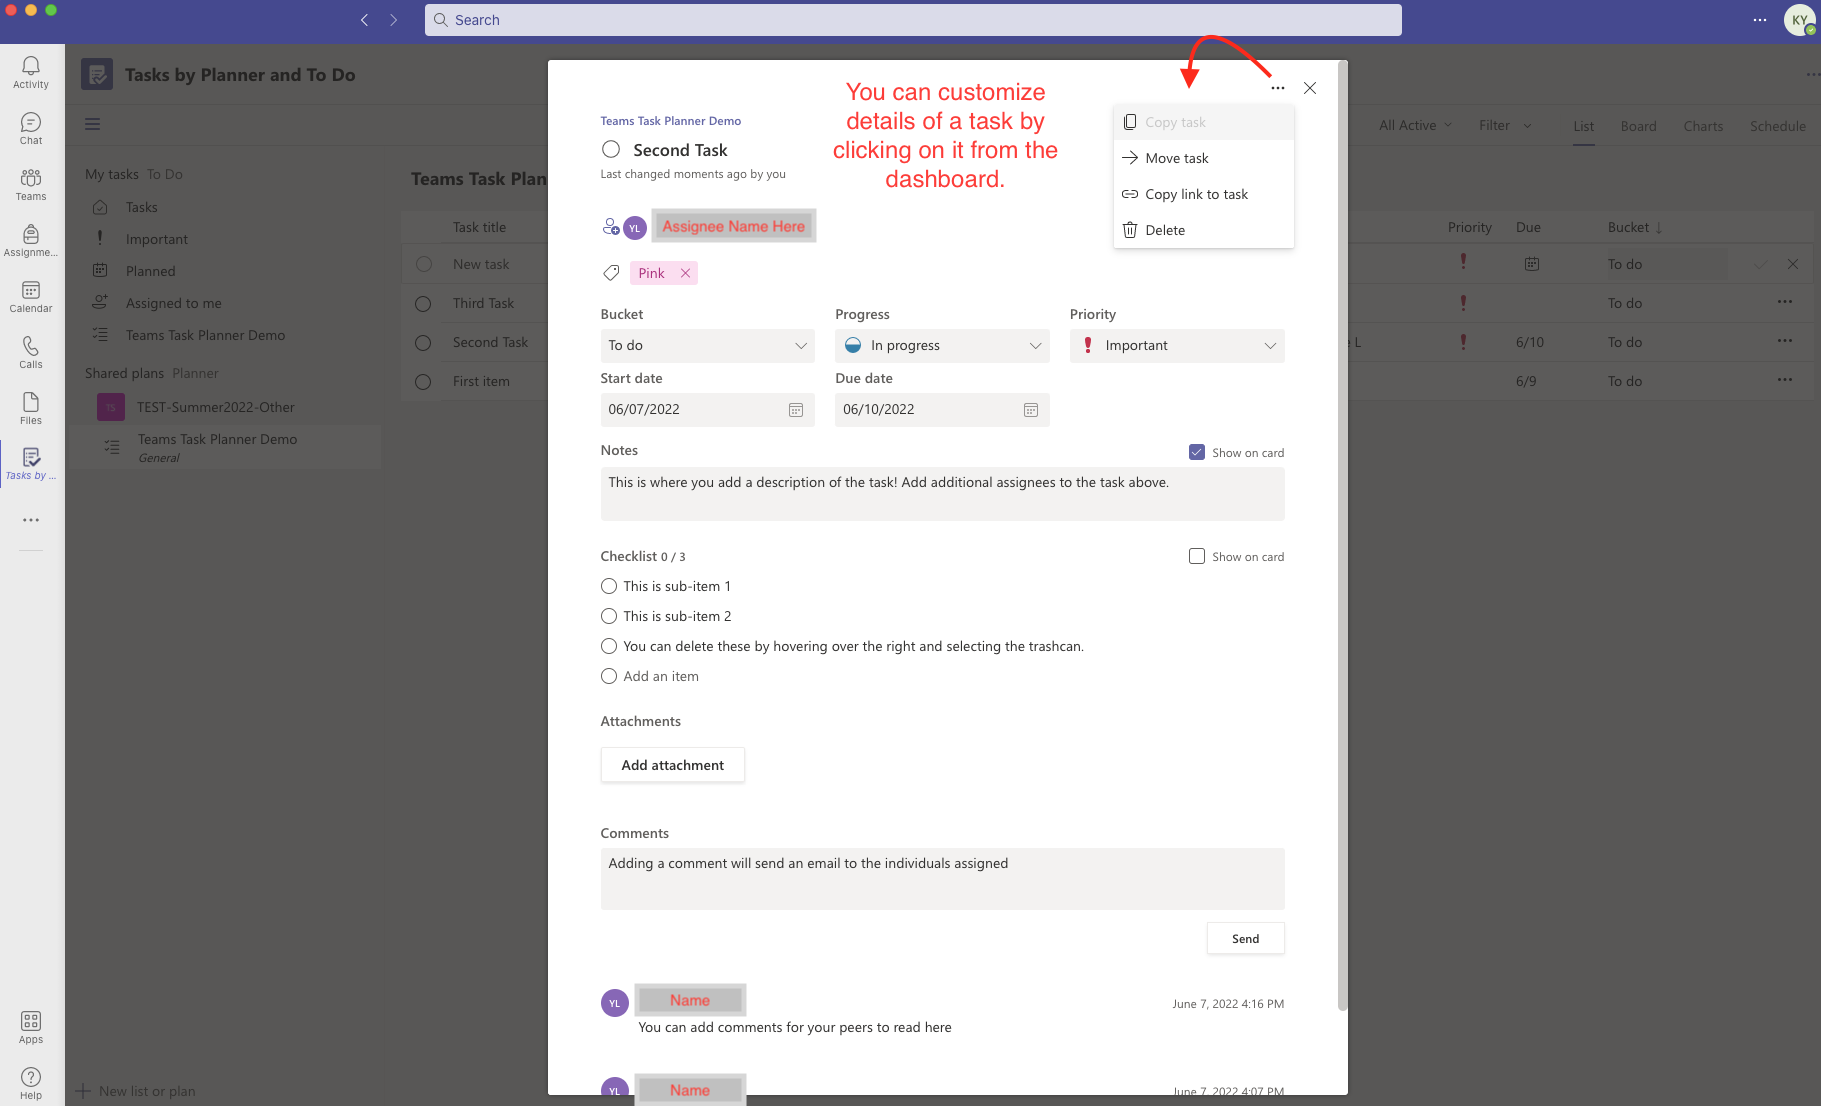
From the dashboard with tasks, you are able to click on tasks to see more details. This includes adding assignees, due dates, details, sub-items, comments, and more.
The next important view is the board. In the board view, there is the ability to add buckets, columns, to help track progress of tasks. This is especially helpful for a team working in Agile. An example of a board with Agile buckets is below.
Option 2: Using Linear
If your team does not have access to MS Teams Planner, another tool to help manage tasks is Linear. Start by navigate to the Linear and creating an account.
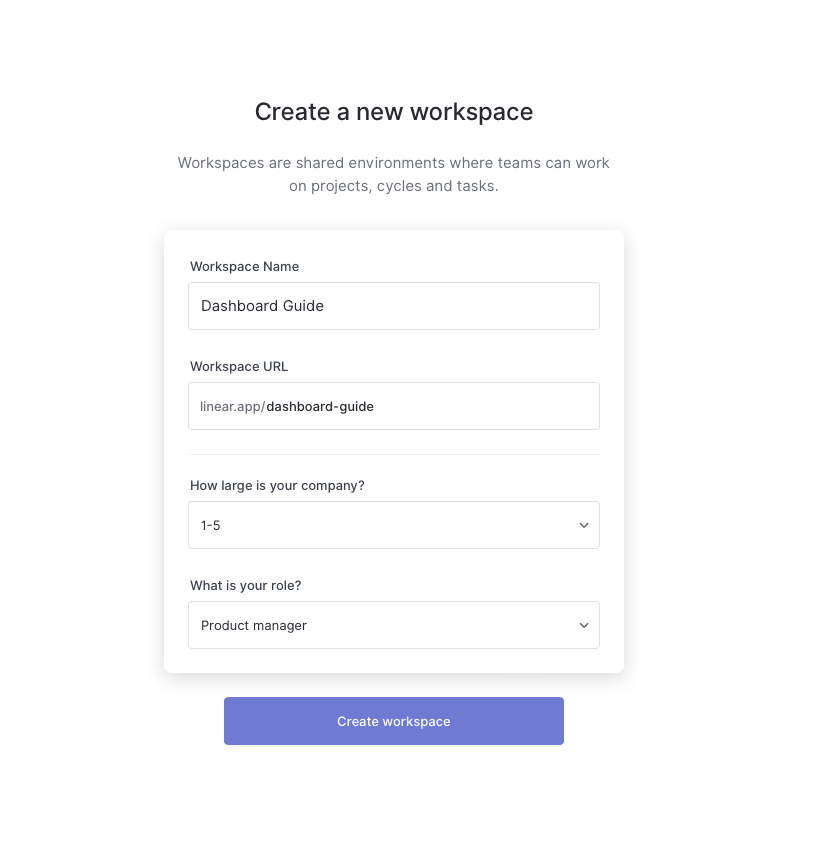
First, create a new workspace. The text entered will be the project title showed in Linear.
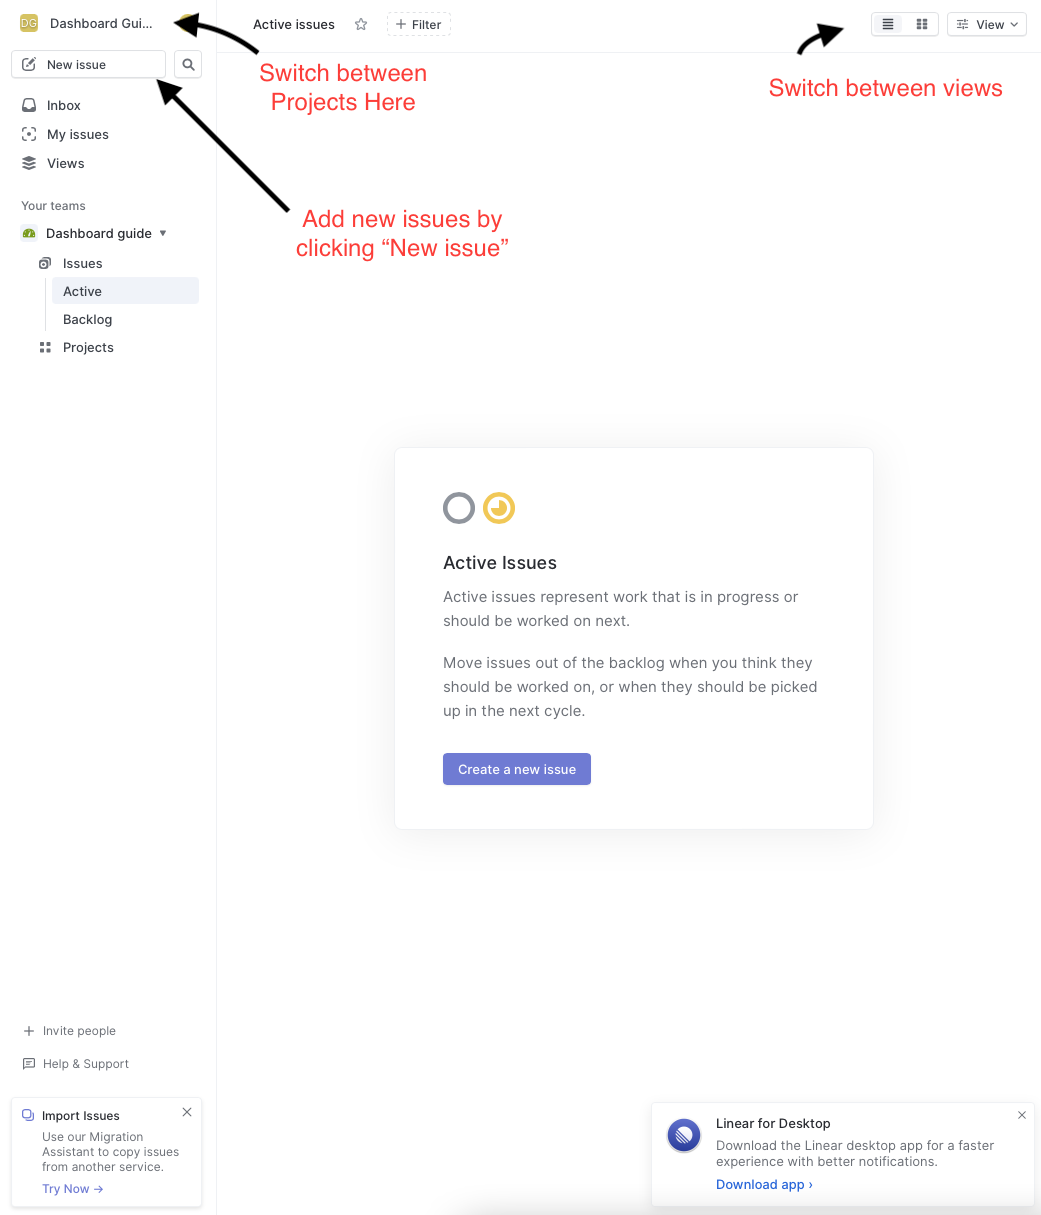
You will then be brought to the dashboard for the new workspace. From here you can switch between a list view and column view. Here I am using the columns, not the list. You can also switch between projects if you have multiple Linear workspaces. One of the most important actions on the dashboard page is creating issues. Issues are equivalent to goals or tasks of The Data Mine project.
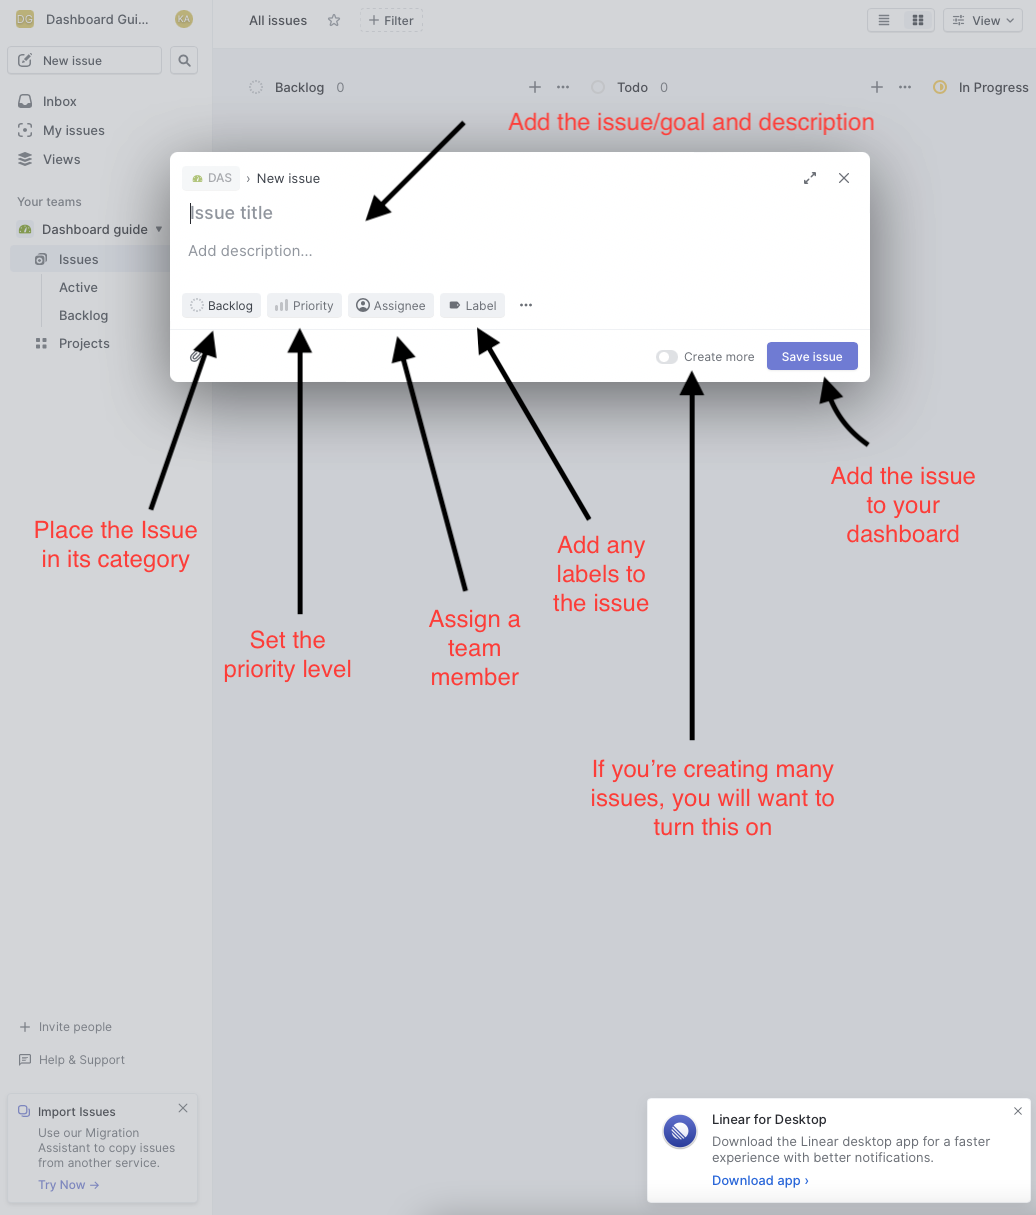
What does creating an issue look like? Once you select "New issue" on the dashboard you will get a pop up in the top part of your screen. In the pop up, you are able to add the title, description, and assign details. Details include progress category (most issues will start in the backlog) priority level, assignee, and labels which are customizable. Then you can create the issue and it will be added to your dashboard.
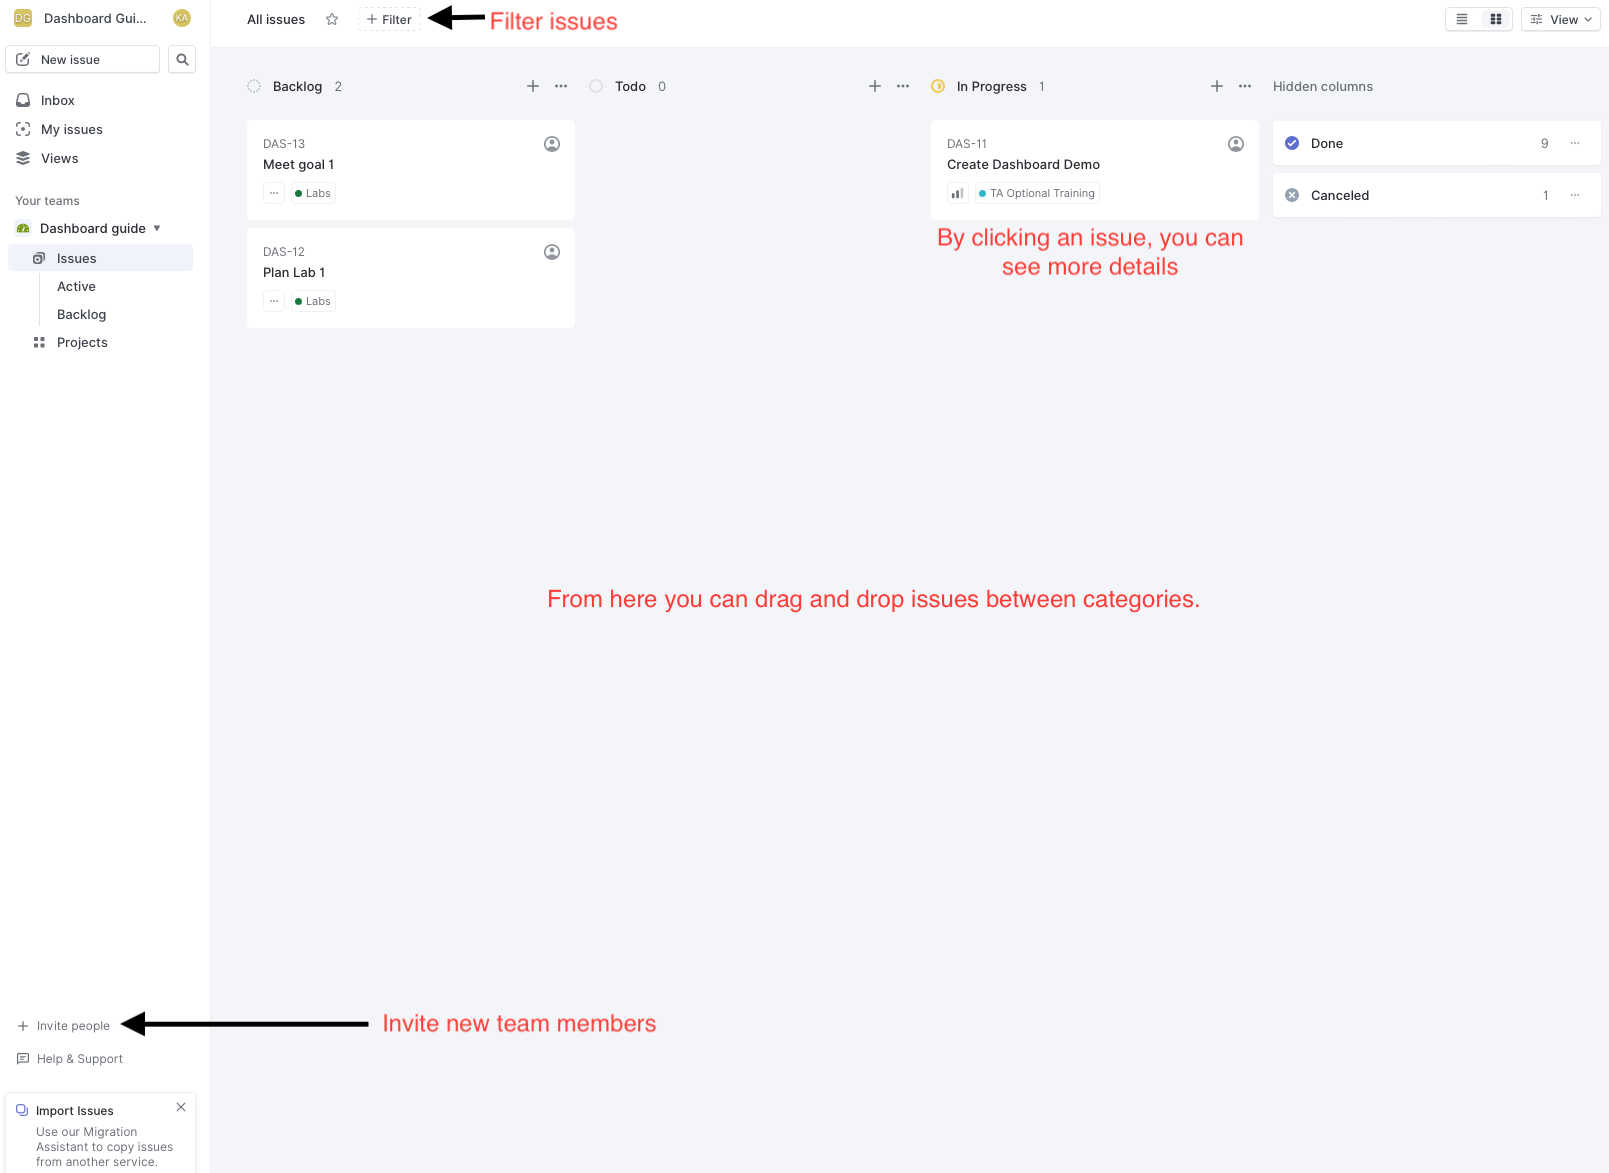
The image below depicts a basic example of a dashboard. Once there are issues on the dashboard, you are able to filter the issues. Drag-and-drop issues into different columns or rows to move their progress along. You are also able to view details of specific issues by clicking on the issue.
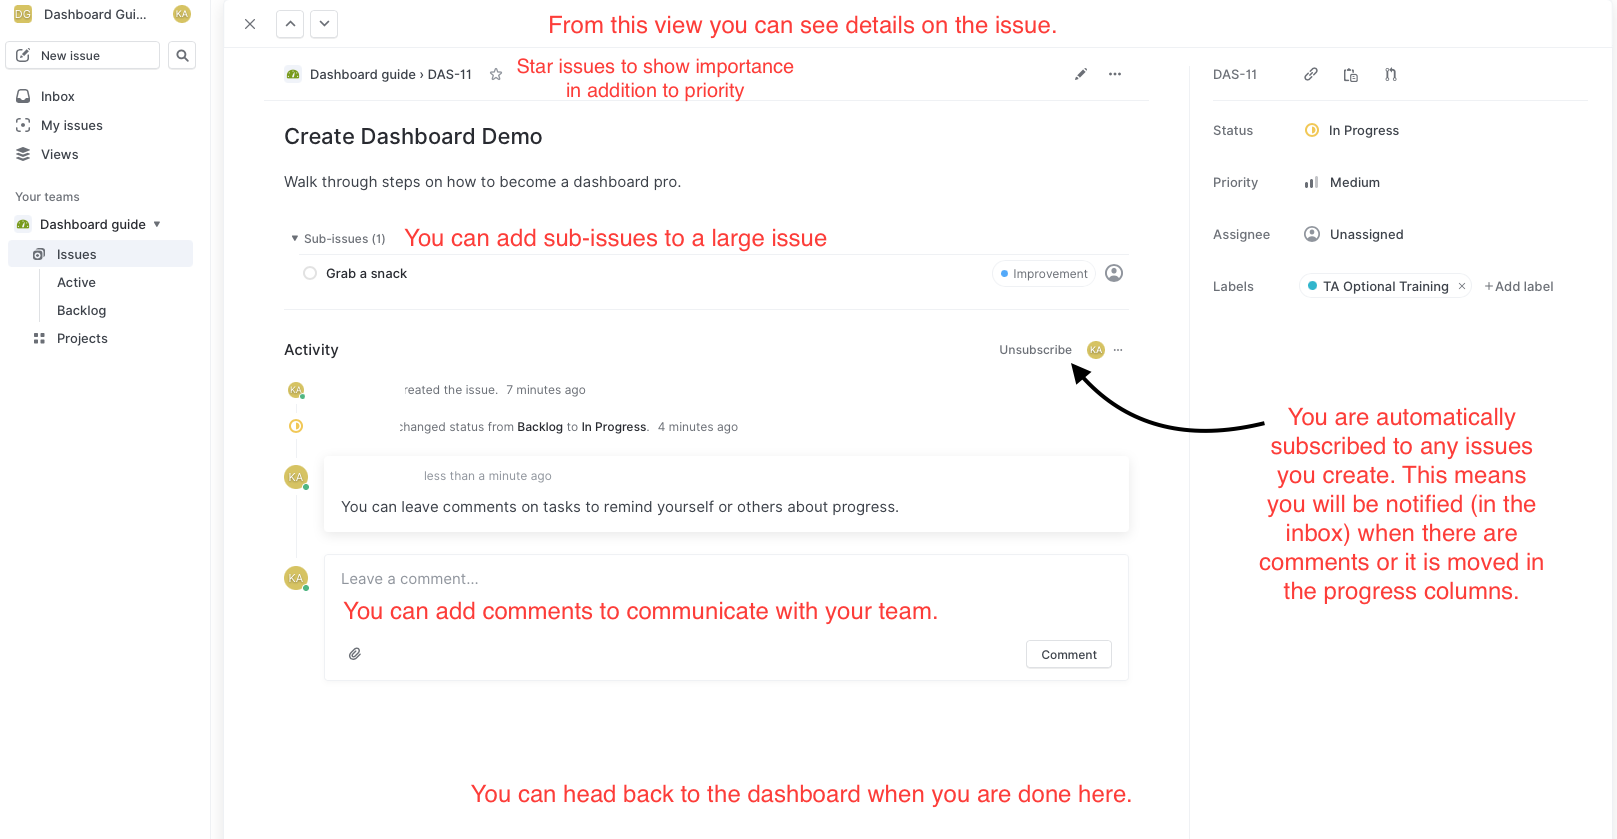
The issue details shows lots of information. sub-issues and comments can be added to each main issue. Linear also subscribes your account to the issue, so you will be notified about any changes made to the issue. The notifications are very helpful when tracking what has been completed and when.
These are the basics of setting up a Linear Dashboard for Sprints. From here you can continue to explore the many features Linear offers.